Buid Home Raspberry Pi NAS
NAS, or Network Attached Storage, is a specialized storage device connected to a network, providing centralized file-level data access to multiple users and devices. It facilitates convenient data sharing, backup, and storage management within a local network environment.
In this tutorial, I will go trough the process of buding a working NAS using raspberry pi and external drive as well as a plex server for video streaming at home netowrk. I will also explain the neccesarry problems that enconterd and the solution of the problems.
You will need the following hardware.
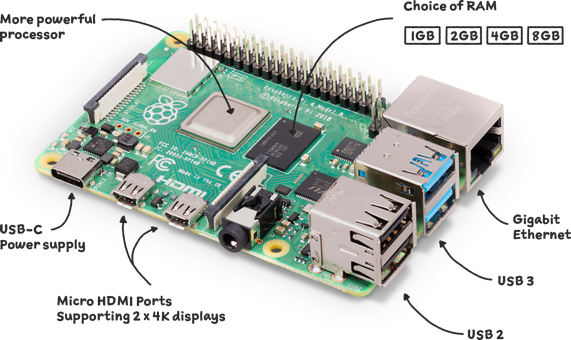
Raspberry pi 4B

I used the 4GB version of raspberry pi, other version also works for this project. But a better CPU will help to stream video faster without delay.
External drive
I used a 14T external drive with external power.
You will need to install the following software or operating systems
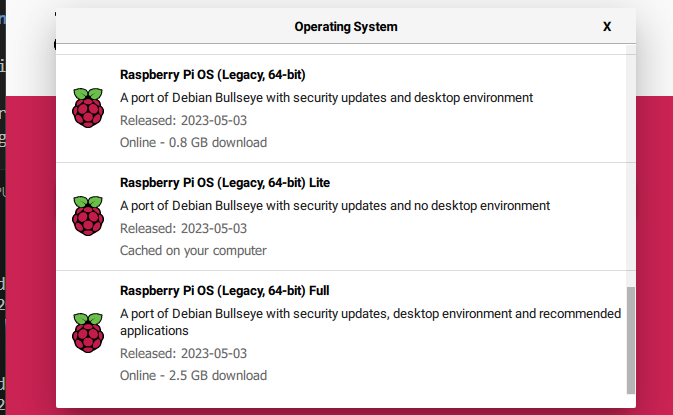
Debian Bullseye with no desktop environment

You need to chose the no desktop envrironment debian bullseye operation system otherwise you will enconter problems to install the openmediavault.
Openmediavault
OpenMediaVault (OMV) is a free and open-source network-attached storage (NAS) solution. It serves as an operating system for NAS devices, offering a web-based graphical user interface for easy management of storage, file sharing, and other server-related tasks. OMV supports various storage technologies, plugins, and features, making it a versatile platform for creating and managing home or small business NAS systems.
The github repository to install the the Openmediavault: https://github.com/OpenMediaVault-Plugin-Developers/installScript
Before install it update and upgrade your raspberry pi
sudo apt-get update && sudo apt-get upgrade
Use the following command to install and you should wait a long time.
sudo wget -O - https://github.com/OpenMediaVault-Plugin-Developers/installScript/raw/master/install | sudo bash
After the installation you should able to access the website using the ip address of the raspberry pi. Then the deault login creditionas are
user name: admin
password: openmediavault
After login, you should able to access the dashboard of the openmediavault. You can change the password after login.
To create a shared folder that can be access by the computer you will need to do the follow operation in the dashboard:
- mount the driver to the system
- create a shared folder under storage tab
- create a shared folder under the SMB/CIFS service
After you do above steps, you are able to access the shared folder using windows. Right click the empty space in the directory This PC. And click the add netowrk location type \\your-server-ip and select the shared folder.
You might enconter some problem about the permission denies when you restart your raspberry pi. That is because by defaut if a external drive newly loaded to the system is umask 0022. You should check two things to give correct access to it.
ls -l
This is showning the the permission setting for the current files. The correct permission should be drwxrwxrwx. If not,try to change the directory permission by using sudo chmod 777 your-directory. Double check the permission agian after you run the command.
You may enconter the problems that not able to change the permission. In this case, you should check the umask value.Type umask in terminal. If it shows 0022, you should modify the settings for the initial umask. Use sudo -e /etc/fstab to open the file and modify the existing driver permission to the following
UUID=12102C02102CEB83 /media/windows ntfs-3g auto,users,permissions 0 0
The UUID will be your own ID for the external drive.
Reboot the raspbeery pi. You will be able to upload file through the network location on windows now.
Plexserver
Plex Server is a media server software that enables users to organize, stream, and share their multimedia content, such as movies, TV shows, and music, across different devices. It provides a user-friendly interface and supports various platforms, allowing users to access their media library remotely. Plex Server also offers features like transcoding, which adapts content for optimal playback on different devices, making it a popular choice for creating a personal streaming server at home.
Before we install he plexserver. We should update the key and repository information for the system
sudo apt-get install apt-transport-https
curl https://downloads.plex.tv/plex-keys/PlexSign.key | gpg --dearmor | sudo tee /usr/share/keyrings/plex-archive-keyring.gpg >/dev/null
echo deb [signed-by=/usr/share/keyrings/plex-archive-keyring.gpg] https://downloads.plex.tv/repo/deb public main | sudo tee /etc/apt/sources.list.d/plexmediaserver.list
sudo apt-get update
sudo apt install plexmediaserver
After installation you can access the plex web using https://your-ip-adress:32400/web
If you use other smart TV you can connect the plex to the plex server using the ip adress.